
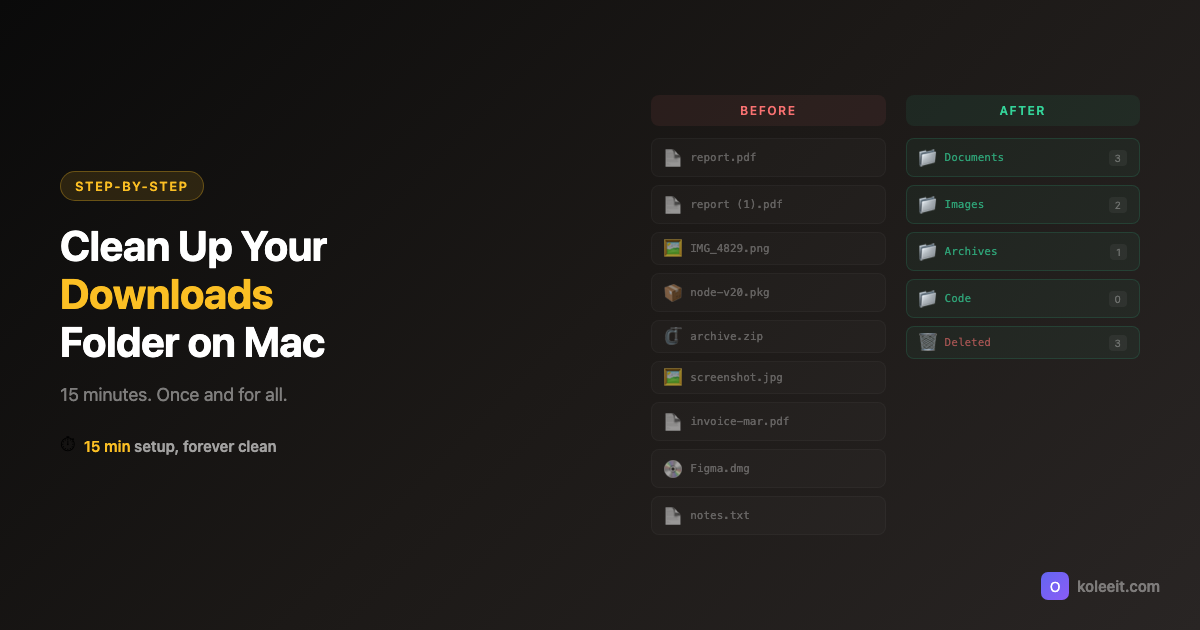
Right-click your Downloads folder. Get Info. How many items?
If the number is north of 500, you're not alone. The Downloads folder on Mac is where files go to be forgotten. Every PDF you opened once, every installer you ran, every image you saved "just in case" - all piled up in one place.
Most cleanup advice says "just delete what you don't need." That takes an hour, and the mess returns in two weeks. Here's a system that takes 15 minutes and actually keeps working after you forget about it.
Step 1: The 5-Minute Purge
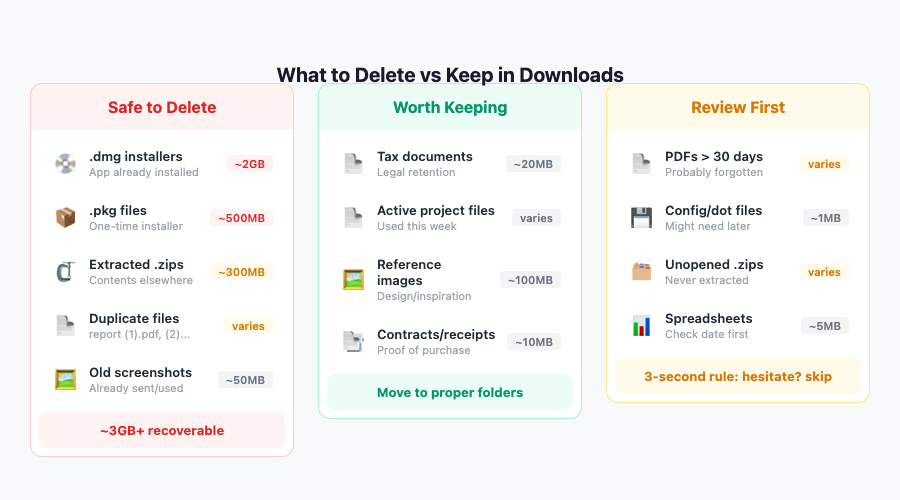
Before organizing anything, reduce the volume. Here's exactly what's safe to delete and what to keep:
Sort by Date Added (View, then Sort By, then Date Added in Finder). Everything older than 30 days? You probably don't need it.
Instant deletes (don't even think about it):
- .dmg and .pkg files. Installers. You already installed the app. These alone are probably eating 2GB+.
- .zip files you already extracted. The contents are somewhere else. The zip is dead weight.
- Duplicate downloads.
report.pdf,report (1).pdf,report (2).pdf. Keep the latest, trash the rest. - Screenshots you sent once. That bug screenshot you Slacked three weeks ago. Gone.
- Browser download artifacts.
.crdownload,.part,.downloadfiles from interrupted downloads.
Worth keeping (but move out of Downloads):
- Tax/legal documents. Move to a dedicated Documents/Tax folder.
- Active project files. Anything you touched this week belongs in its project folder.
- Receipts and contracts. Proof of purchase for software, hardware, services.
The 3-second rule:
If you hesitate more than 3 seconds on any file, skip it and move on. Come back to the maybes after everything else is handled. This step should take 5 minutes max.
Step 2: Create a Simple Folder Structure
You don't need 20 folders. You need 5.
~/Downloads/
├── Documents/     (PDFs, spreadsheets, presentations)
├── Images/        (photos, screenshots, design files)
├── Code/          (source files, configs, scripts)
├── Archives/      (zips, tars, compressed files)
└── Other/         (everything else)
That's it. Resist the urge to create "Invoices" and "Receipts" and "Tax Documents 2026" subfolders right now. You can always add those later. Start simple.
Why this structure works: It maps to how you search for files. "I need that PDF" = check Documents. "Where's that mockup?" = check Images. You don't think in 20 categories - your brain thinks in 5.
Step 3: Sort What's Left
Move your remaining files into these 5 folders. You have two options:
Manually in Finder (10 minutes): Open Finder in List view, sort by Kind. Select all PDFs (Cmd+click), drag to Documents. Select all images, drag to Images. Repeat for each type.
Pro tip for manual sorting: Use Finder's "Arrange By Kind" view (View > Group By > Kind). This clusters files by type automatically, making it easy to select entire groups at once.
With a file organizer app (30 seconds): Point a file organizer app at your Downloads folder and let it sort by category automatically. What took 10 minutes manually takes one click.
Step 4: Stop the Mess from Coming Back
This is the part most guides skip. Cleaning up once is easy. Keeping it clean requires a system.
Option A: Weekly manual sweep (free, requires discipline)
Set a calendar reminder every Friday: "Clean Downloads." Sort new files into your 5 folders. Delete obvious trash. Takes 2-3 minutes if you do it weekly.
The key: do it before the pile grows past ~20 files. At 20 files, it takes 2 minutes. At 200, it takes 20. The habit is easier when it's fast.
Option B: Watched folder automation (set and forget)
Set up Downloads as a watched folder in a file organizer app. New files get sorted automatically the moment they arrive. PDFs land in Documents. Screenshots land in Images. That random .zip goes to Archives.
I've used this setup for months and my Downloads folder hasn't had more than 10 unsorted files in it since. For details on how to set up automation, see How to Automatically Organize Files on Mac.
Option C: The nuclear option - auto-delete old files
macOS has a built-in setting: System Settings, General, Storage Management, "Remove items from the Trash automatically" (after 30 days).
For Downloads specifically, you can set up rules to trash files older than 90 days that you haven't opened. Aggressive, but effective if you treat Downloads as a temporary inbox rather than permanent storage.
The One Rule That Makes Everything Work
Treat Downloads as an inbox, not a filing cabinet.
Files arrive in Downloads. They should leave within a week - either moved to their proper home or deleted. If a file sits in Downloads for more than 30 days, it's either important enough to file properly or not important enough to keep.
The moment you start treating Downloads as a place to store files, you've lost. It's a landing pad, not a destination.
Quick Setup Checklist
- Purge installers, duplicates, and old files (5 min)
- Create 5 folders: Documents, Images, Code, Archives, Other (1 min)
- Sort remaining files into folders (5-10 min)
- Set up automation or weekly reminder to prevent recurrence (1 min)
- Calendar reminder to check in 2 weeks
Total: 15 minutes. Time saved per month: at least an hour of digging through file chaos.
Want to compare automation tools? See Best Mac File Organizer Apps in 2026 for a detailed 6-app comparison, or learn how to set up automatic file organization.